Churchill Polar Bear Adventure Photo Tips
Photo guru and Naturalist guide Court Whelan details how to photograph like a pro and get the most out of a Churchill polar bear adventure!
What’s in your Camera Bag? Churchill Polar Bear Adventure
It’s that time of year when Polar Bears are off the ice and migrating through the Western and Southwestern coasts of Canada’s Hudson Bay. This means that folks are soon headed up to Churchill to photograph the iconic King of the Arctic.
Read on to make sure you have the right gear with you to get the photos you’ve always dreamed of.
Please note, photographic styles vary, as do conditions on the ground. While this is meant to be a guide for choosing your camera gear, you should consider your own photographic interests first and foremost.
Wide Angle Zoom
This is certainly one of the most important lenses to consider bringing on an adventure “up north.” While polar bear photos are no doubt the most anticipated, there are many other experiences that you’ll wish to photograph, including general landscape scenes, travel experiences, and the town of Churchill, too. Something in the range of 18-55mm, 24-70mm, or 24-105mm for DSLRs or a 7-20mm, or 12-40mm on a mirrorless setup is ideal.

Zoom Telephoto
Having flexibility in your telephoto lens is immensely helpful while photographing polar bears, as they can be at a range of distances. It’s not uncommon for polar bears to be within only a few yards, as they are curious creatures, all the way up to a hundred yards plus from you (after all, they are 100% wild animals!). Generally speaking, your common zoom telephotos are top choices, like 70-300mm and 100-400mm on DSLRs and 40-150mm on mirrorless setups.
There are new lenses coming out that get you, even more, telephoto than this, all while maintaining a nice zoom range (Sigma’s 150-600mm comes to mind). I haven’t personally tested these for sharpness and ease of use, but I can say that with each new lens and camera system I experiment with, I’m continually amazed at the higher and higher quality as new technologies consistently push the limit (in a good way!).

Maybe a super telephoto?
When I think super telephoto, I usually think about prime lenses 400mm or greater, but more commonly your 500mm and 600mm lenses. If you’re not familiar, these are wonderful lenses and generally have incredible optics. However, they are often quite pricey, too. If you already own one of these and are considering bringing it on your polar bear expedition (examples would be a 400mm f/2.8, 500mm f/4 or 600mm f/4 on DSLR or 150mm f/2.8 on mirrorless), it’s indeed worth thinking about.
Whether or not you pack it is really going to depend on a) what else you plan on bringing for lenses and b) what style of photographer you are. For instance, if you plan on bringing several smaller lenses (e.g., ultra wide, medium telephoto…10-22mm and 24-70mm) and a couple zoom telephotos like a 70-200mm and 100-400mm, a super telephoto might be a bit too much. However, if you plan on just one wide angle like a 24-70mm, one medium telephoto like a 70-200mm, along with your 500mm f/4, I’d say go for it. Again, 400mm should usually cover 90% of the shots, but you never know when it comes to wildlife…best to be prepared.
The risk here is that you can actually have too much telephoto — you definitely won’t need 500mm all the time. Thus, it’s a balancing act of covering your focal ranges while also making sure you aren’t inundated by too much camera gear and too many options. Versatility is key.
When thinking about a large telephoto, a second camera body is highly advisable, as you will not use it the majority of the time.
X-factor Lenses
I am always thinking about how to get a different shot. If you go online and search for lion photos on safari, there is a lot of competition out there. Of course, first and foremost your photography is for you, and you shouldn’t worry too much about what other people are doing. But, by going to out-of-the-norm and meaningful locations like Churchill means that you’re part of a small group of people that have access to some of the most incredible sights and sounds. Thus, you have the potential to really do something with your photos!
As a result, I am a big fan of bringing a couple “x-factor” lenses along with me, particularly my trusty ultra-wide angle and nifty-fifty lens. My ultra-wide, if you’re not familiar, is capable of near-fish-eye effect, having a ridiculously wide angle of view. Mine personally is a 17-40mm, used on a full frame camera. For crop-frame cameras, a 10-22mm is excellent. Other options for full frame set-ups include 14-24mm and 16-35mm lenses. These enable you to get really unique shots that you’re not going to see elsewhere…period.
The other lens I generally bring is my nifty-fifty, which is a 50mm f/1.4 lens. While it is fixed and has little versatility as a walking around lens, it can produce stunning results with shallow depth of field. In fact, I often will force myself to use it, just because I can see things and capture things differently (there’s that word again!). Snow on wooden windowsills? All of the sudden a common sight is a compelling storytelling photo.

Accessories and other gear
You’re going to be in cold weather environments, so be sure to bring extra camera batteries and keep them warm by storing them in your pocket (the body heat prolongs their life). And of course, bring plenty of memory for your camera.
A tripod is generally not necessary, and I personally feel they are just too much to deal with when exploring the tundra in all-terrain vehicles. It’s far better to plan on hand holding your camera and being able to move from one part of the vehicle to the other to get the shot. Lugging a tripod along and having to set it up each and every time will result in missed shots.
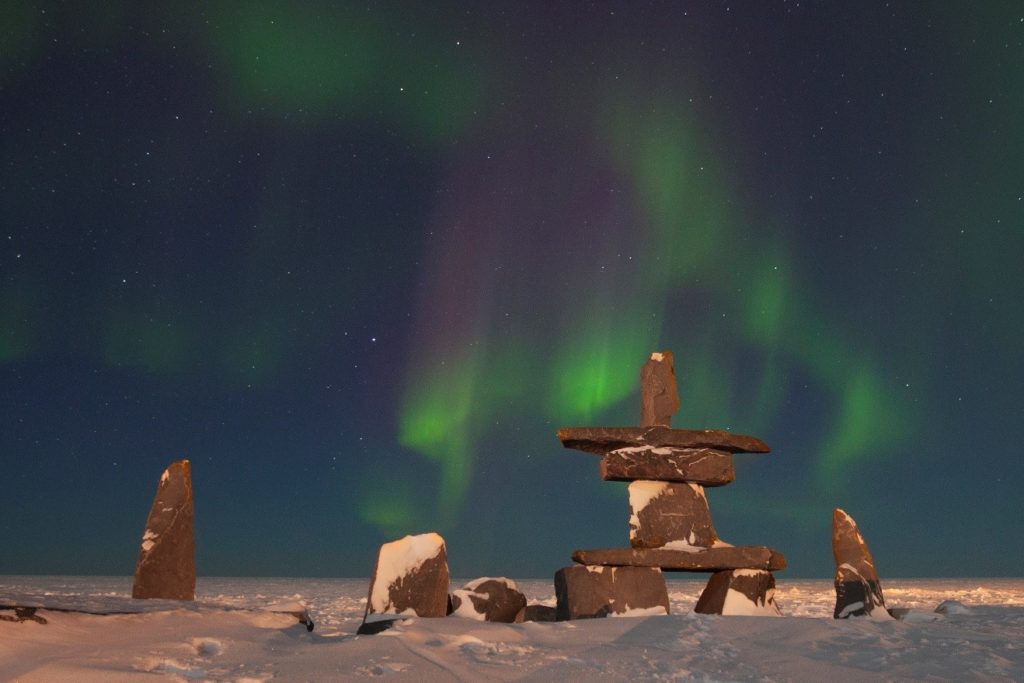
However, if you are lucky enough to see the northern lights up in Churchill, a tripod is essential. If the lights come out, you’ll be shooting in the dark and generally at exposures between 5” – 15”. Thus, it’s worth bringing a small travel tripod with you, and keeping it in your room until there’s that lucky chance to use it one night.
Last but not least, folks with lots of lenses may wish to bring a second camera body. Being able to put a wide angle on one body and a telephoto on the second will virtually double the number of shots you’ll get. And, the more shots you take, the more show-stopping images you’ll have for a lifetime.
Hope these tips are helpful and don’t hesitate to recommend your own in the comments below.
All the best,
Court