Natural Habitat Adventures guide extraordinaire Brad Josephs is in Churchill and the northern lights have been better than ever! This post he wrote is originally published on his Bears and Beyond blog site. Check out his other chronicles of all his amazing adventures guiding around the globe.
I just finished guiding two of my most productive Aurora expeditions I have ever guided. Many people assume that since we are no longer at the peak of the 11-year cycle, aurora displays are poor- well the last few weeks has proved that very wrong! Aurora has put on a show 95% of the nights from January 20-February 12. This is off the charts! Here are some highlight images of an amazing two trips….. All images were taken with Sony A9 and 16-35 2.8 Sony GM lens.


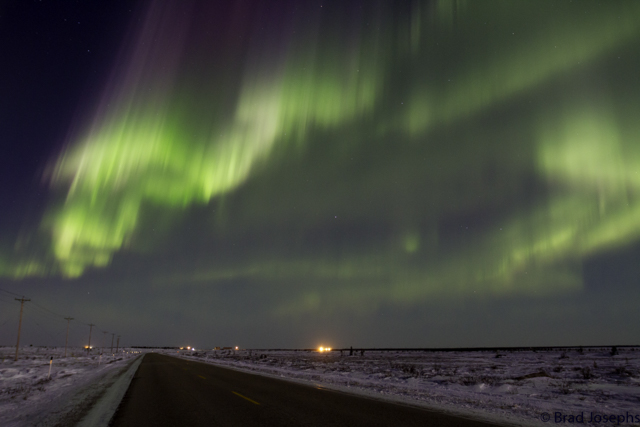
Here is one still from a time-lapse sequence that I hope to create soon. My Sony A9 collects so much color and light I had to desaturate the image to keep it from looking artificial. This was taken during a KP-3 display at the Natural Habitat Adventures’ Aurora Pod.

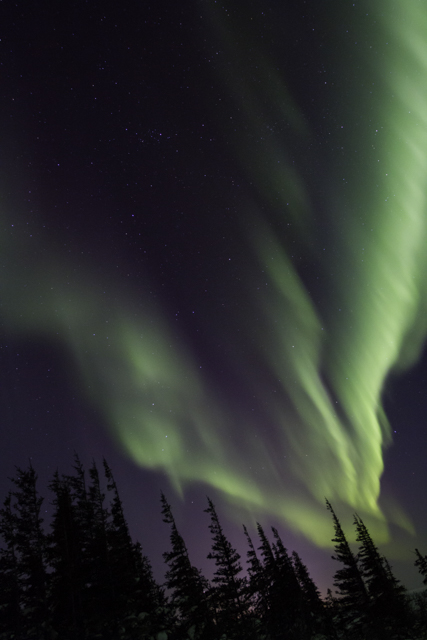
One still from a time-lapse sequence that I have yet to create. This was a super strong display on a kp-5 night. Taken in the boreal forest near Dave Daly’s dog mushing camp. I adjusted the white balance to fluorescent because the original shot was too yellow. I also desaturated it 10 points in lightroom.

The aurora pod.

I love to have iconic white spruce trees in the foreground.


One of the favorites of the season- Dave Daly’s traditional Metis teepee.


The boreal forest behind the Northern Studies Center made for an excellent foreground during this KP-3 display.

The skies went wild the last night of our last trip between 12:30 and 1:30 am. Folks who slept in that morning were thankful that they had the energy to stay awake and alert during a lifetime highlight for us all.

Travelers Phil and Lynne Seymour with an aurora background. I used a split second of light from a flashlight to illuminate them.

This display was short but beautiful on the first night of our first trip on a KP-2 night. I desaturated this 4-second exposure image with an ISO 2000 to -14 in lightroom.

The Aurora Pod is shown at the left corner.
Here is a repost of a blog post I did last year on how to photograph aurora Aurora Photography 101-

Tis the season for aurora borealis photography! Long nights and cold, clear arctic high-pressure systems make late January-March the best time to go chase those magical northern lights. Traveling to the north in the winter can be an intimidating adventure, and photographing the aurora is some of the most challenging photography in existence. Here are a few ideas to help folks make the most of their auroral endeavors.
Where to go? Without getting into too many geophysical details…. There are two bands which are centered around the magnetic poles in the Northern and Southern high latitudes. Your best chance to see auroral activity is under the Auroral Oval or Van Allen Belt. In the North, the oval is shifted south of the true north pole in Canada, so central and eastern Canada gets auroras further south than anywhere else.

This is the band of auroral activity shown by this map, made by the University of Alaska Fairbanks, on an average night. Notice that Hudson Bay is the furthest south extent of the band.
By looking at the map above, one would travel to somewhere under the bright green ring. Popular locations in Canada are Whitehorse, Yellowknife and Churchill, Manitoba. In Alaska, the band is centered north of Fairbanks, near the Arctic Circle (much further north than it is in Canada). Two factors are very important to consider; logistics and weather. I recommend traveling to a place where the weather is on average the clearest. Central Canada has a much higher chance of clear skies than Iceland or Scandinavia, which are dominated by Atlantic Ocean marine weather (clouds, rain, storms.) For logistics, if you are in London, it is much easier to go to Norway than Manitoba…. If you live in the United States, Manitoba is a very easy trip.
If you plan to travel to a city like Yellowknife or Fairbanks, you must get far outside of town (at least 20 miles), as city lights obscure aurora viewing.
There are many reasons why NatHab chooses Churchill, Manitoba as the base for our aurora trips. First, it is very easy to get to for North American travelers. We start our trips from Winnipeg which is just a quick hop from Chicago, Minneapolis or Denver, and then we charter a 2-hour flight to Churchill as a group- much easier than going to Northeastern Alaska! Also, Churchill is far away from the cloud-producing Pacific Ocean, so we have a great chance for clear skies now that Hudson Bay has frozen. Plus there are lots of cool things to do during the day, like dog mushing and igloo building.
A shorter exposure will capture the definition in the auroral “curtains,” giving them sharp lines and edges. You can still capture enough light in under 5 seconds by using a higher ISO, and using a lens that gathers light such as an f 2.8 or lower.
Settings and Equipment-Setting your camera up to photograph aurora is a little bit complicated, and doing so in the dark, in very cold temperatures makes it as difficult as any type of photography in my opinion.
Aperture– Open as wide as your lens will go (f2.8 on my canon 16-35)
Shutter Speed– Generally between 1 and 10 seconds. A shorter exposure will make the aurora sharper, as they are moving.ISO– At least 1000, as you are trying to capture lots of light in a short amount of time. Noise produced by higher ISOs is easily corrected in Lightroom.
Focus– You MUST be on manual focus, as your camera will not fire in the dark on autofocus. Set your focus to Infinity (far away.) My lens has a distance meter on it, so I can focus on infinity very easily. If you don’t have that, try focusing on the moon, or a far away light and leave it there. Turning your focus ring all the way counter-clockwise does not work, as infinity is actually just a hare back to the right.
Self Timer- I use a 2-second timer, so when I push the shutter it does not move the camera. I have had very bad luck with cable releases at cold temps. After a few minutes at -20f or colder the cable becomes stiff and the camera electronics start going haywire.
Tripod- Must have! Really cheap, flimsy plastic tripods are difficult to adjust at night, clunky, and can become brittle and break in the cold.
Filters- remove UV and polarizers as they can cause distortion during long exposures in the low light.


Aurora over a traditional Metis teepee outside of Churchill at Dave Daly’s dog mushing camp (Wapusk Adventures.)
Dealing with cold temps-
I always set my camera settings inside a warm place with plenty of light, then move the camera outside and leave it there for the duration of the night. The camera generally doesn’t care about the cold, but when you move it inside, the warm humid air immediately freezes on the cold surface. Ice will form on the glass until the internal temperature of the lens warms up, which could be hours! This condensation is not good for electronics. When I go inside to warm up I remove the battery and take it inside with me, so it is a good idea to make sure you have a tripod base which allows for easy access of the battery while the camera is mounted. I put a cloth over the camera so that hoarfrost doesn’t accumulate on the camera while it is outside and not being used. Do not breath on the lens! At the end of the night, I seal the camera inside a ziplock bag so it warms up slowly and is not exposed to all of the moisture in the inside air.
Be very careful of frostbite! I have gotten frostbite 3 times in my life- all while photographing aurora in Churchill. I have frozen the tip of my nose twice because it touched the LCD screen. Touching metal at very cold temps can cause near-instant frostbite. Wrapping plastic tape around metal tripod legs can help with this. Also, remember these conditions are extremely dehydrating, so drink way more water than you think you need to maintain your energy level, comfort and immune system.
What To Bring?
-Tripod. Don’t go too cheap and make sure it easy to use. Figure out how to use it before you go!
–Wide angle lens– 16 mm or less for a cropped sensor camera, 24 or less for full frame camera. My friends are recommending the Rokinon 14mm 2.8 and the 24mm 1.5, I love my canon 16-35 2.8!
-Gloves- Bring a variety of weights ranging from heavy mittens to light liners that you can adjust your camera with.
-Headlamp– A red light lens or covering helps from blinding your partners.
-External batteries for devices- Your smartphone battery won’t like the cold any more than you. Expect 20% of your normal battery life. Also, bring some extra camera batteries and an extra charger just in case!
-Boots– Sorel or similar with a removable liner so you can dry them out at night. Condensation will make them damp as your body heat touches the cold rubber(provided by Natural Habitat)
–Hand and toe warmers, Facemask and really warm hat. (provided by Natural Habitat)
-Parka – depending on where and when you go will determine how heavy it needs to be.(provided by Natural Habitat)
-Snowpants- Insulated and windproof. (provided by Natural Habitat)

Dave Daly’s Metis Teepee with active auroral substorm raging above.
Expectations- Inaccurate expectations are the most common cause of a bad trip. Remember, aurora doesn’t appear to your eyes as it does in a good photo. Camera sensors can gather light, especially the rare purples and reds that sometimes appear. Photographers also often oversaturate their photos in post-process to wow their social media followings. I call this the “dirty little secret of the North.” Photographers are normally very pleased with their images, but people expect to be “dazzled” in real life after watching high-speed time lapses on the internet are often disappointed. That being said, experiencing the aurora borealis is a magical opportunity that everyone should brave at least once in their lives. I never tire of watching them dance, looking at my photos, and helping others do the same!

Myself and Jim Floyd self-portrait in front of a cozy dog mushing tent in the Boreal forest outside of Churchill on a frigid night.
More to come soon-North to the future! Brad

